by C. Elkins, OK Math and Reading Lady
I wanted to show you another example of math art, this time using squares and triangles. This project also falls under the standards dealing with decomposing and composing shapes. With this project, students can create some unique designs while learning about squares, triangles, symmetry, fractions, and elements of art such as color and design. It would be a great project for first grade (using 2 squares) or for higher grades using 3 to 4 squares.
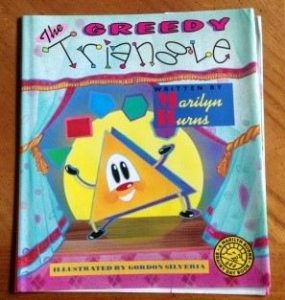 A great literature connection to this project is the book “The Greedy Triangle” by Marilyn Burns. (Click link to connect to Amazon.) The triangle in this book isn’t content with being 3-sided and transforms himself into other shapes (with the help of the Shapeshifter). Lots of great pictures showing real objects in the shape of triangles, squares, pentagons, hexagons, and more.
Marilyn Burns is a great math educator to check out, if you haven’t already. She has a company called Math Solutions (check out MathSolutions.com). Marilyn and her consultants have wonderful resources and advocate for constructivist views regarding math education. She is also the author of Number Talks and many math and literature lesson ideas.
The 4 Triangle Investigation
Materials needed:
- Pre-cut squares 3″, 4″ or 5″ (I used brightly colored cardstock.)
- Scissors and glue
- Background paper to glue shapes to
Directions
- Model how to cut a square in half (diagonally) to make two right triangles. (I advocate folding it first so that the two resulting triangles are as equivalent as possible.)
- Guide students into showing different ways to put two triangles together to form another shape. Rule: Sides touching each other must be the same length. Let students practice making these shapes on their desk top (no gluing needed).
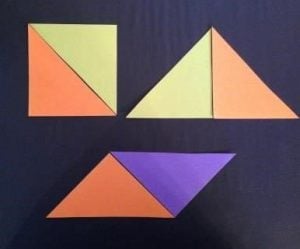
- Help students realize they may need to use these actions:
- Slide the shape into place
- Flip it over to get a mirror image
- Rotate it around in a circular motion to align the edges
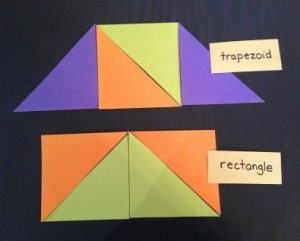
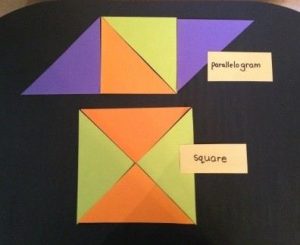
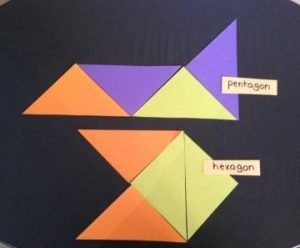
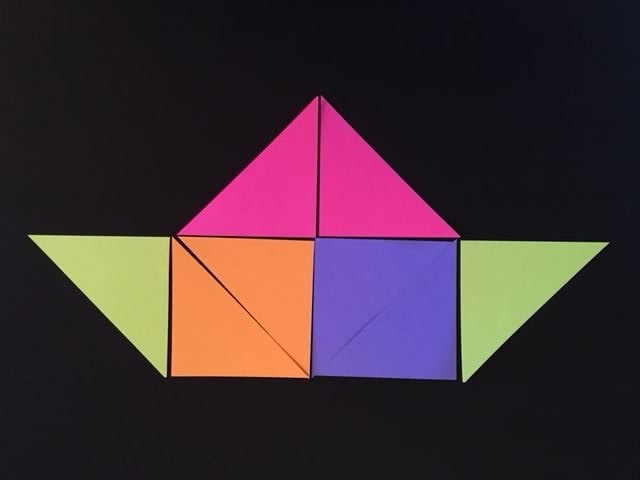
- Students are then given 2 squares (to be cut into 4 triangles) and investigate different shapes they can make following the above rule. Here are some possibilities:
- As the teacher, you can decide how many creations you want each student to attempt.
- These shapes can be glued onto construction paper (and cut out if desired).
- As an extension, shapes can be sorted according to various attributes:
- # of sides
- symmetry
- # of angles
- regular polygons vs. irregular
Through this investigation, students learn that squares can be decomposed into triangles and can then be used to construct (compose) many other polygons (some regular, some irregular). They also have the opportunity to search for congruent shapes by rotating or flipping them to see if they match previously constructed shapes.
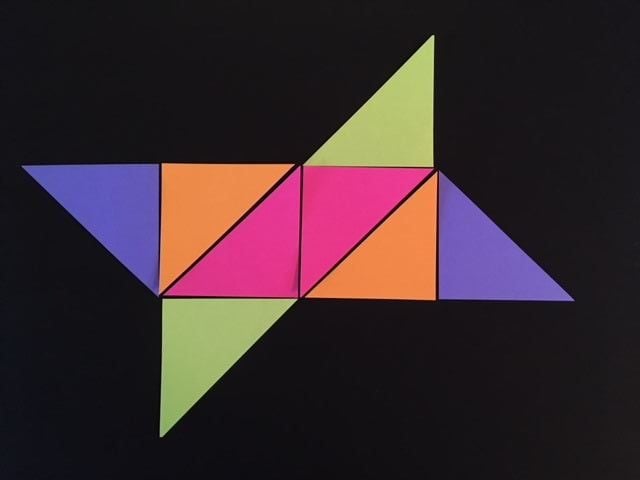
Other extension activities would consist of increasing the number of triangles used and/or drawing the designs on graph paper. Here are some creations using 3 squares (6 triangles).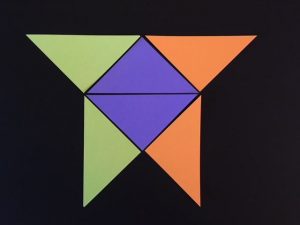
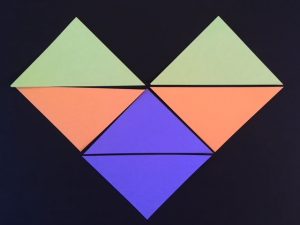
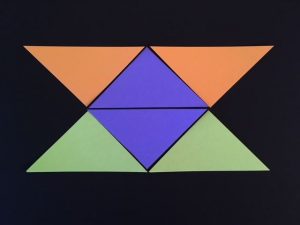
Here are some possible creations using 4 squares (8 triangles):


Another possibility: Allow students to cut some of the triangles in half again (which is 1/4 of the square) to add to the designs. The rule must still be followed: Sides touching each other must be the same length.
Thanks for hanging around!
Awesome tips for this standard! I will definitely be trying this next year. 😁