by C. Elkins, OK Math and Reading Lady
I realize many of you (teachers and parents) may be searching for ways to link every day activities to math so that children can learn in a practical way while at home during this surrealistic period. Happy Fourth of July and . . . .Here’s a list of things you might like to try:
Outdoors
- While bouncing a ball, skip count by any number. See how high you get before missing the ball. Good to keep your multiplication facts current.

- How high can you bounce a ball? Tape a yardstick or tape measure to a vertical surface (tree, side of house, basketball goal). While one person bounces, one or two others try to gauge the height. Try with different balls. Figure an average of heights after 3-4 bounces.
- Play basketball, but instead of 2 points per basket, assign certain shots specific points and keep a mental tally.
- Get out the old Hot Wheels. Measure the distance after pushing them. Determine ways to increase or decrease the distance. Compete with a sibling or friend to see who has the highest total after 3-4 pushes. Depending on the age of your child, you may want to measure to the nearest foot, inch, half-inch or cm.
- Measure the stopping distance of your bicycle.
- Practice broad jumps in the lawn. Measure the distance you can jump. Older students can compute an average of their best 3-4 jumps. Make it a competition with siblings or friends.
- Some good uses for a water squirt gun:
- Aim at a target with points for how close you come. The closer to the center is more points.
- Measure the distance of your squirts. What is your average distance?
- How many squirts needed to fill up a bucket? This would be a good competition.
- Competitive sponge race (like at school game days): Place a bucket of water at the starting line. Each player dips their sponge in and runs to the opposite side of the yard and squeezes their sponge into their own cup or bowl. Keep going back and forth. The winner is the one who fills up their container first. Find out the volume of the cup and the volume of water a sponge can hold.
- Build a fort with scrap pieces of wood. Make a drawing to plan it. Measure the pieces to see what fits. Use glue or nails (with adult supervision).
- Take walks around the neighborhood. Estimate the perimeter distance of the walk.
- In the pool:
- Utilize a pool-safe squirt gun (as in #6 above).
- Estimate the height of splashes after jumping in.
- Measure the volume of the pool (l x w x h). The result will be in cubic feet. Convert using several online conversion calculators such as this one: https://www.metric-conversions.org/volume/
- Measure the perimeter of the pool. If it is rectangular, does your child realize the opposite sides are equal. This is a very important concept for students regarding geometry (opposite sides of rectangles are equal).
- What if you want to cover the pool? What would the area of the cover be?
- Measure how far you can swim. Time the laps. What is the average time?
- Watch the shadows during the day. Notice the direction and the length. Many kids don’t realize the connection between clocks and the sun. Make your own sun dial. Here are a few different resources for getting that done, some easier than others:
Indoors
- Keep track of time needed (or allowed) for indoor activities: 30 minutes ipad, 1 hour tv, 30 minutes fixing lunch, 30 minutes for chores, etc. This helps children get a good concept of time passage. Even many 4th and 5th graders have difficulty realizing how long a minute is. This is also helpful as a practical application of determining elapsed time. Examples:
- It’s 11:30 now. I’ll fix lunch in 45 minutes. What time will that be?
- I need you to be cleaned up and ready for bed at 8:30. It’s 6:30 now. How much time do you have?
- You can use your ipad for games for 1 hour and 20 minutes. It is 2:30 now. What time will you need to stop?
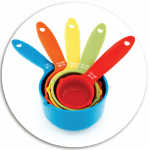
- Explore various recipes and practice using measuring tools. What if the recipe calls for 3/4 cup flour and you want to double it?
- In the bathtub, use plastic measuring cups to notice how many 1/4 cups equal a whole cup. How many 1/3 cups in a cup? How many cups in a gallon (using a gallon bucket or clean, empty milk carton)?
- While reading, do some text analysis regarding frequency of letter usage.
- Select a passage (short paragraph). Count the number of letters.
- Keep track of how often each letter appears in that passage. Are there letters of the alphabet never used?
- Compare with other similar length passages.
- After analyzing a few, can you make predictions about the frequency of letters in any given passage?
- How does this relate to letters requested on shows such as “Wheel of Fortune” or letters used in Scrabble?
- Fluency in reading is a measure of several different aspects: speed, accuracy, expression, phrasing, intonation.
- To work on the speed aspect, have your child read a selected passage (this can vary depending on the age of the child). Keep track of the time down to number of seconds. This is a baseline.
- Have the child repeat the passage to see if the time is less. Don’t really focus on total speed because that it not helpful for a child to think good reading is super fast reading. Focus more on smoothness, accuracy and phrasing.
- Another way is to have a child read a passage and stop at 1 minute. How many words per minute were read? Can the child increase the # of words per minute (but still keep accuracy, smoothness, and expression at a normal pace)?
- Play Yahtzee! Great for addition and multiplication. Lots of other board games help with number concepts (Monopoly, etc.)
- Lots of card games using a standard deck of cards have math links. See my last post for ideas.
- Measure the temperature of the water in the bathtub (pool thermometers which float would be great for that). How fast does the temperature decrease. Maybe make a line graph to show the decline over time.
- Gather up all of the coins around the house. Read or listen to “Pigs Will be Pigs” for motivation.
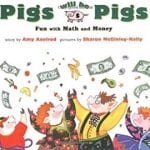 Keep track of how much money the pigs find around the house. Count up what was found. Use the menu in the back of the book (or use another favorite menu) to plan a meal. Be sure to check out Amy Axelrod’s other Pig books which have a math theme Amy Axelrod Pig Stories – Amazon Here is a link to “Pigs Will be Pigs”: Pigs Will Be Pigs – Youtube version
 - Help kids plan a take-out meal that fits within the family’s budget. Pull up Door Dash for a variety of menus or get them online from your favorite eateries. This gives great practical experience in use of the dollar to budget.
- Look at the local weekly newspaper food advertisements. Given a certain amount of $, can your child pick items to help with your shopping list? If they accompany you to the store, make use of the weighing stations in the produce section to check out the weights and cost per pound.
- Visit your favorite online educational programs for math games or creative activities. See a previous post regarding “Math Learning Centers.” The pattern blocks and Geoboard apps allow for a lot of creativity while experiencing the concept of “trial and error” and perseverance. These can be viewed at the website or as an app. Here’s a link to it to save you time. Virtual math tools (cindyelkins.edublogs.org)
 Please share other activities you recommend!! Just click on the speech bubble at the top of this post or complete the comments section below. I miss you all!