Place Value: Part 3 — With Number Operations +/-
by C. Elkins, OK Math and Reading Lady
Place value understanding is critical when solving addition, subtraction, multiplication, and division problems. Add fractions and decimals to the mix too! This post will focus on building on parts 1 and 2 (counting and composing and decomposing numbers by place value) to add and subtract whole numbers and decimals.
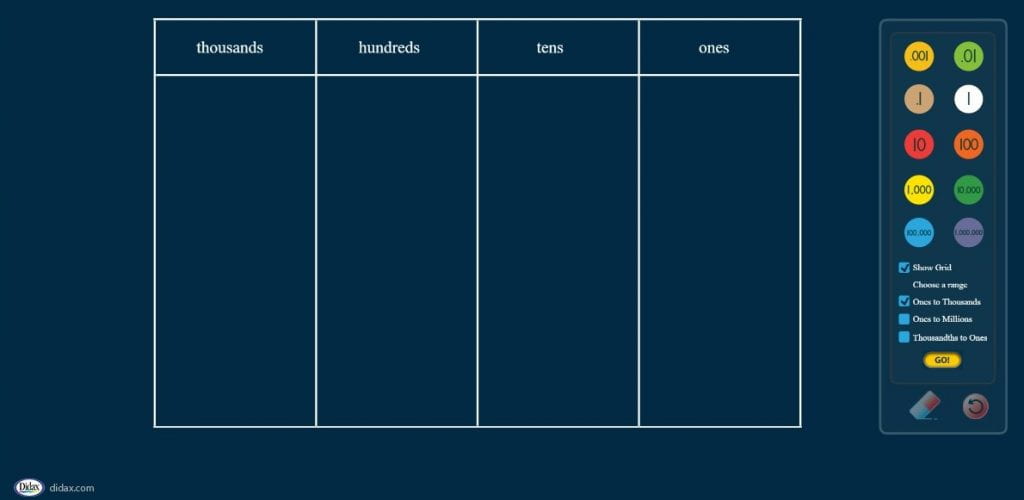
Virtual Manipulatives for Place Value:
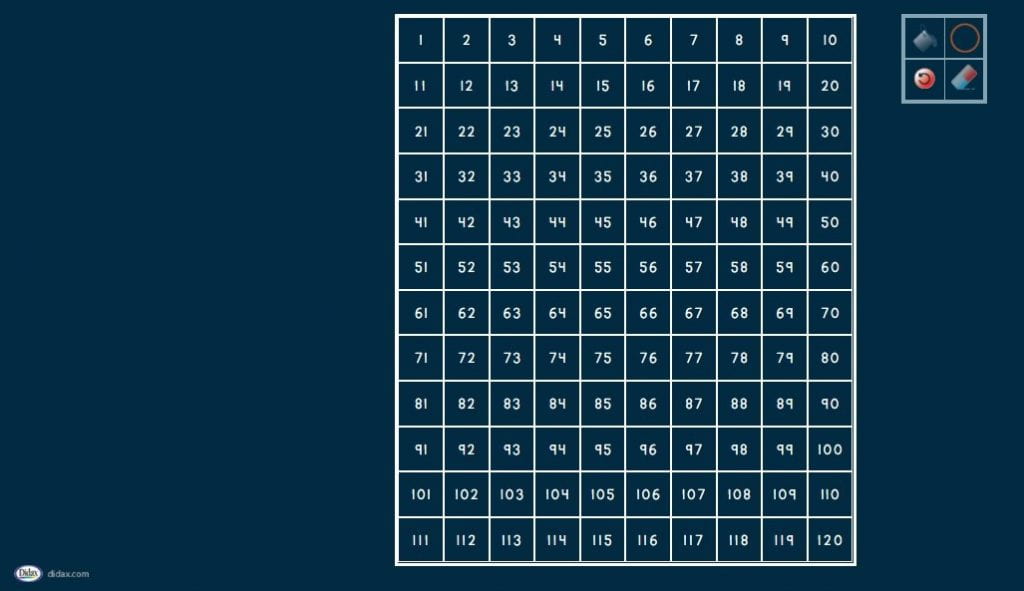
Here is one of my favorite free websites for all kinds of virtual manipulatives. You will defintely like the base ten and place value disks. Both of these include options for decimals. The 0-120 grid is also great! You can add different colors to the numbers using the paint can.: https://www.didax.com/math/virtual-manipulatives.html

With the above manipulatives, students can practice these basics concretely and pictorially; then transition to solving them mentally:
- 10 + single digit such as 10+7 = 17, 10 +3 = 13
- Multiple of 10 + single digit such as 20 + 4 = 24, 40 + 8 = 48
- Multiple of 100 + single or double digit such as 100 + 5 = 105, 200 + 30 = 230, 500 + 25 = 525
- 1 more, 10 more 100 more as well as 1 less, 10 less, 100 less
- Add to numbers with 9’s such as 90 + 10, 290 + 10, 1900 + 100
Addition and Subtraction:
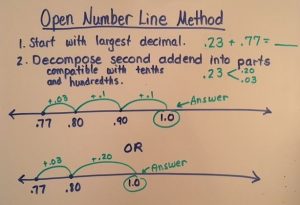
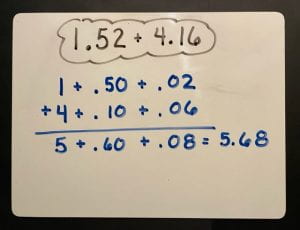
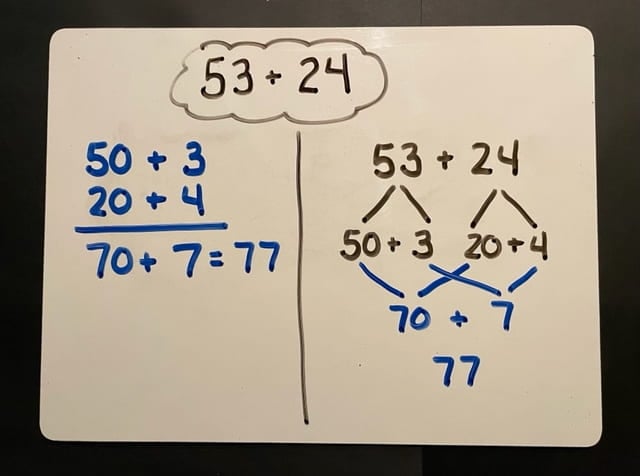
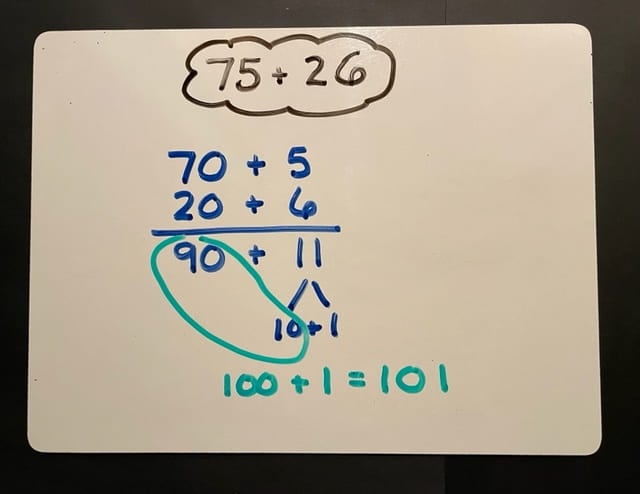
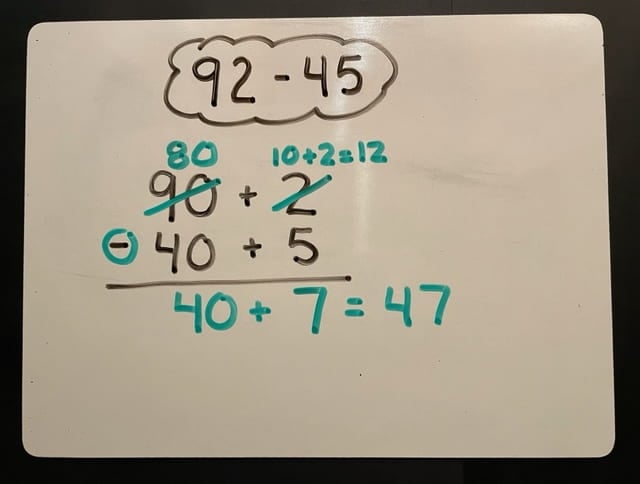
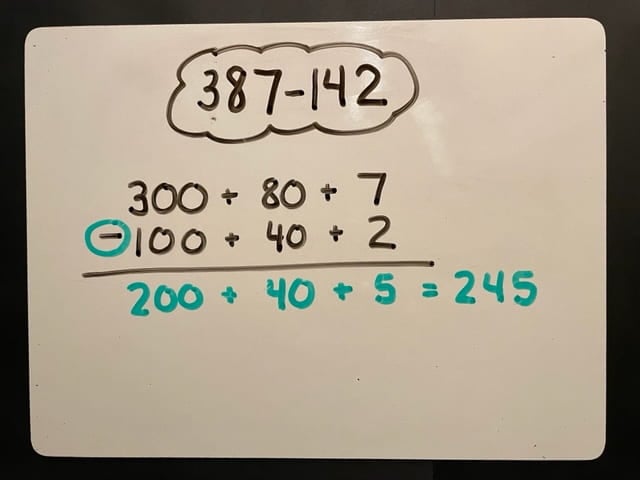
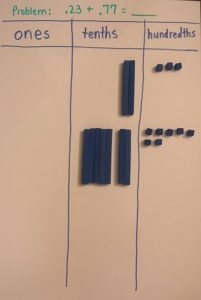
- Decompose and then add or subtract
- Break numbers apart by place value and follow operation (horizontal application)
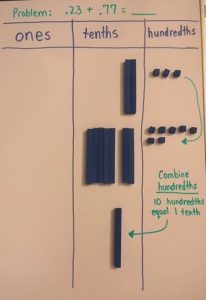
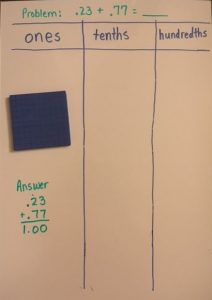
- Show regrouping with subtraction
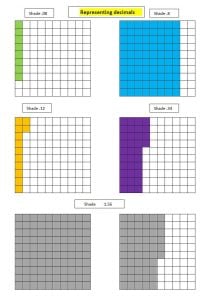
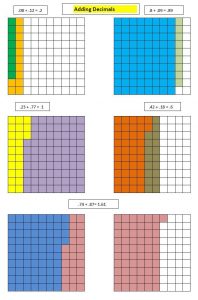
- Applies to decimals too
-
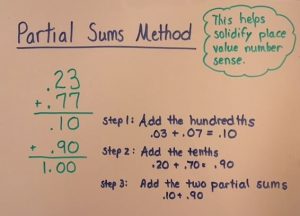
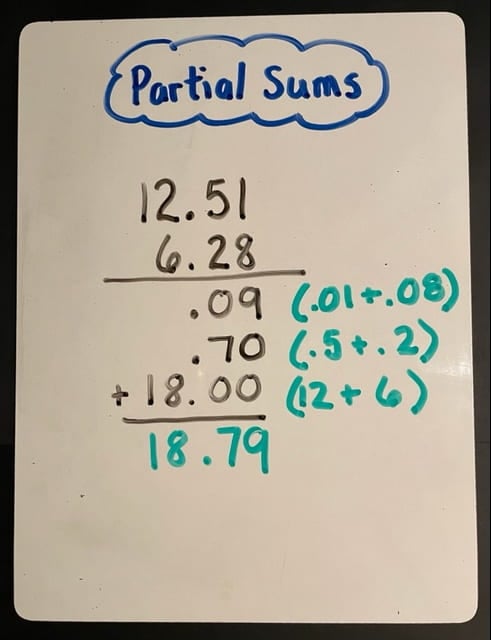
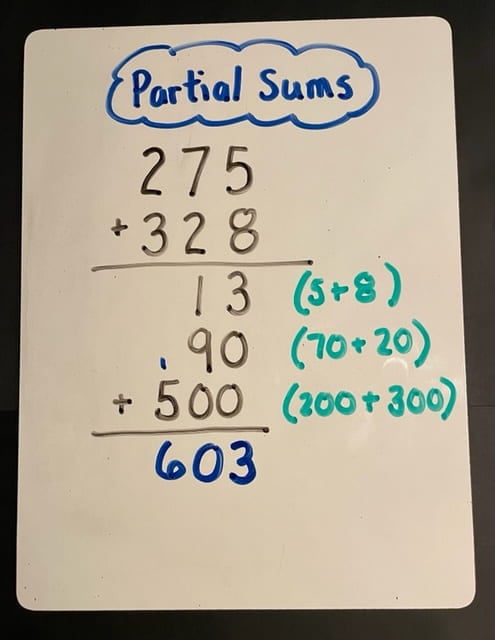
- Partial sums
- Solve in parts without “carrying” the digits. This gives students a chance to develop the full understanding of the value of the digits (vertical application)
-
- Solve in parts without “carrying” the digits. This gives students a chance to develop the full understanding of the value of the digits (vertical application)
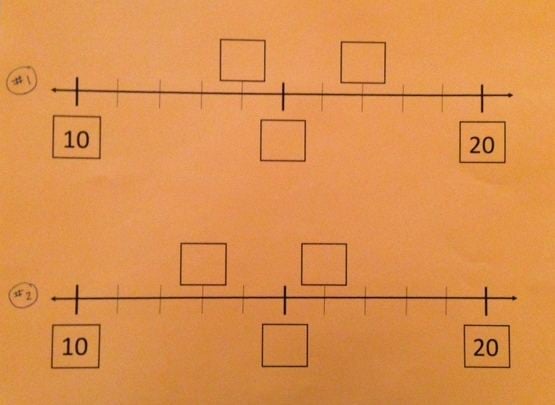
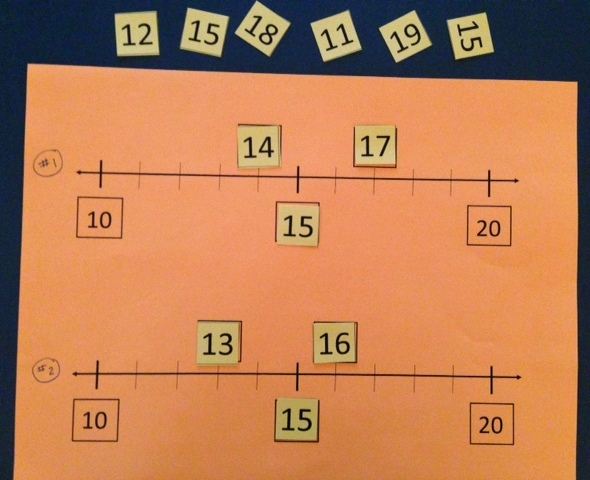
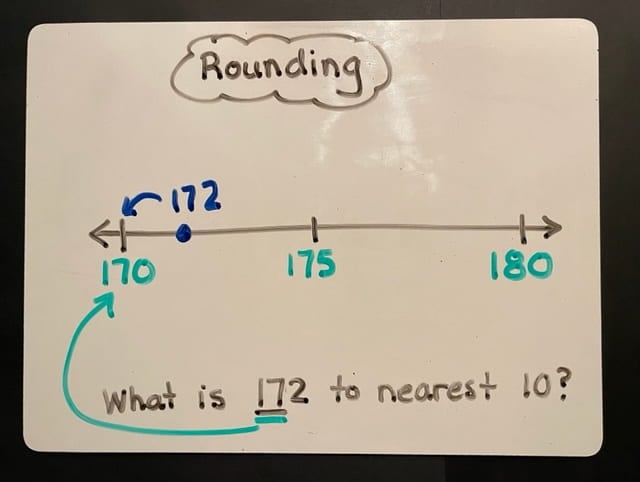
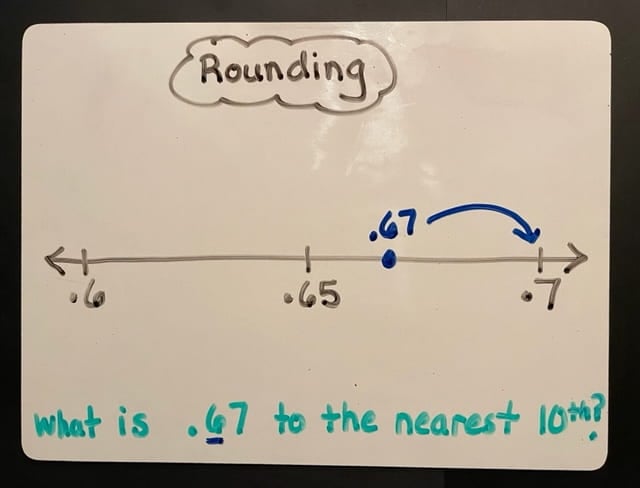
- Rounding
- Instead of rules about digits bigger than 5 or less than 5, rounding using a number line helps a student think about place value and where the target number falls between two benchmark numbers. Ex.: 175 comes between 100 and 200, or 175 comes between 170 and 180.
-
- Instead of rules about digits bigger than 5 or less than 5, rounding using a number line helps a student think about place value and where the target number falls between two benchmark numbers. Ex.: 175 comes between 100 and 200, or 175 comes between 170 and 180.

Next post will be ways to emphasize place value when solving multiplication and division problems. If you have some ideas to share, please feel free to comment.
 I appreciate all of my faithful followers the past 5 years! Thank you for viewing and passing this along to other teachers or parents. I hope you all have a restful holiday break!!

 In a
In a