Teaching the Alphabet / Letter Sounds Online

by C. Elkins, OK Math and Reading Lady

How do you go about teaching your online students about the alphabet and letter sounds when you can’t be with them in person? That is the topic of today’s blog.  By no means do I have all the answers, so please chime in with your ideas too!

In an actual classroom, your students would have opportunities to manipulate and sort objects by letter or beginning sound, to write under your watchful eye and guidance, to find the letter used in actual text, and experience fun learning center-type activities to immerse themselves.  Maybe it’s not as hard as you think — below are some possible teaching strategies (and some FREEBIES) you can use with your students to help teach the letter sounds and alphabet. By all means, ensure this instruction is a regular and systematic part of your teaching routine.

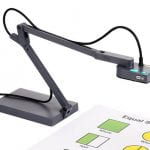
Before I go on, one important piece of equipment in case you are working from home and not at school would be a document camera.  I know from my experience that physically holding something up to the camera for a student to see isn’t always a good idea.  For one thing, it covers your face. It wiggles when you hold it.  It can appear backwards (unless you uncheck “mirror my video” if using Zoom). While the type of document camera purchased for your classroom is likely too costly for home use, there are many small portable ones (see Amazon) in the $100-200 price range that connect to your device via a usb port. With their downloaded software you will be in business!  I use one from Ipevo which I love!

My document camera has been crucial to online teaching. It allows me to show strategies in real time, read text together, play games, show pictures, etc.

  1. Alphabet cards:  Cards that are colorful and a good size to show students under your document camera are essential.
    • Present when teaching the letter / sound for the first time. Show how to form the letter. Use cards easily for frequent review. These are like the type you might have posted on the walls in your traditional classroom.
    • Here is an editible FREE set from TPT. Editable alphabet cards with pictures  While the pictures shown are very good, I did notice on the vowels some of them are using a picture to represent the short sound (apple, elephant, umbrella) while some pictures represented the long sound for the vowel (ice cream, orange).  In some cases, this would prevent me from getting the set — but it’s FREE and you can edit it to change the picture.  Or better yet, for the vowels show 2 pictures (1 to represent each sound).
    • Here is another set from a TPT author who is very early-childhood friendly and has a ton of good free stuff (you may have to join her blog to get access to the free stuff).  I like her alphabet cards because they have a few pictures to accompany each letter.  https://thisreadingmama.com/mega-pack-free-phonics-cards/
  2. Alphabet – how your mouth should be formed:

    O says /o/ like this:

    This is a critical aspect of teaching letter sounds.  It matters how the lips, teeth, and tongue are coordinated to produce the sound.  For example, many young children have difficulty with /l/ and can often be corrected by physically showing them where to place the tongue (behind the front teeth).  You can show them how their lips, etc. should look with each letter.  It’s ok to exaggerate a little bit. And by all means, when working on the next item in my list (video), make yourself visible so they can see how to form the letter with their mouth and you can check via your screen if the child is forming their mouth correctly.

  3. Alphabet videos:  I am sure most all of you have used videos from youtube for your students.  Here is the one I recommend because of the repetition of the letter sound and pictures starting with that sound.  In each video (devoted to only one letter at a time) the student gets dozens of opportunities to say the sound and objects with background music that is motivating to get children to participate.  Here’s one for the letter Mm: “Have Fun Teaching” Letter M /m/ video on Youtube
  4. Alphabet pictures:  With a document camera, showing pictures (or real items) with the beginning sound you are teaching is easy.  Here’s a set (6 b/w pictures for each letter) that can be sent to students to put together as a mini book for each letter, or printed and cut apart for you to use for teaching.  A Dab of Glue Will Do (Blog) Free alphabet booklets  The word is printed with each picture making it easy for you to point to the first letter for emphasis.
  5. Alphabet writing:  If your online students have a whiteboard, you can use your document camera to model how to write the letter, let them practice, and then hold up their board to show you.
  6. Alphabet in text:  It is super important to include opportunities to see the letter you are working on in text.  I recommend using the child’s name, class member names, easy patterned text, or short poems.  Show the text under your document camera or pull up from a licensed site you have access to. Have students find the letter wherever it appears in the text. This shows students how letters are being used.
  7. Alphabet sorting and review:  Using pictures (like from #4 above), you can show a picture (cover the word though) and have students name the letter, hold up a letter tile, or write the letter on their whiteboard to show you. You can also display 2-3 letters (magnetic, tiles, or written in column form on a whiteboard) and help students sort pictures by telling you where to place them. This is also a good video to review all of the letter names, sounds, and pictures/words with that beginning sound:  Jack Hartman Alphabet song
  8. Alphabet practice:  There are a lot of resources you may already have that can be transformed to a digital format via boom cards or Seesaw, etc. Some teachers also print up packets at school for weekly distribution to parents (worksheets, cut-n-paste, sorting), and these could be included as supplmental to your online teaching.

Finally, please read this Alphabet research I summarized.  Alphabet Letter and Sounds Research (C. Elkins Edublog)  Very eye opening and beneficial in my opinion. You will come to understand why children get confused with learning the alphabet.  Example:  “F” is pronounced with a short vowel sound before the letter /ef/ while “J” is pronounced with a long vowel sound after the letter /jay/.  “Double you” = /w/.  “Aych” = /h/.  You will find a great 1 page teaching template for teaching letter sounds which focuses on aspects I mentioned above (Here is the letter, here’s how it sounds, here’s how to write it, here it is in text).  

Take care!  Hope you are all well and safe. Looking forward to your comments!

Phonics Part 3: Vowels and Consonants

by C. Elkins, OK Math and Reading Lady

The 5 vowels make up just 19% of the letters of the alphabet, but have 38 different spellings (for the short and long sounds).  The vowels are much like the “glue” that hold words together. The 21 consonants, on the other hand, make up 81% of the letters of the alphabet, and have 54 different spellings (not including the digraphs). Here again is a 44 Phoneme chart 44Phonemes to illustrate this (from Orchestrating Success in Reading by Dawn Reithaug, 2002.)  Stay tuned for other resources and FREEBIES.

Some other interesting vowel and consonant trivia:

  •  “A vowel is a sound that is produced with no obstructions. The air simply floats through your mouth and has very little interaction with your teeth, your lips, or other structures. On the other hand, a consonant has some degree of air obstruction.” (Dr. Molly Ness, Linuistic expert). So now is everyone trying that out like I did? It’s true!  Producing vowel sounds require little or no lip / tongue movement. Whereas most consonants require specific lip and tongue placement.
  • Each syllable is made up of one vowel sound. This is how we count and divide multi-syllabic words (one vowel sound per syllable).
  • While most single consonants only make one sound, there are a few exceptions such as:  c = /s/ or /k/; g = /g/ or /j/; y = /y/ or /long e/ or /long i/; s = /s/ or /z/; x = /ks/ or /z/ . This reveals the letters c and x don’t have their own unique sound.

Then there is this interesting information about how we say the consonant letter names vs. the sound the letter makes — no wonder kids get confused! Here’s a previous blog post going into more detail on this fantastic research. I think it’s a must read for all elementary teachers: Alphabet Letter and Sounds Research (Cindy’s Blog)

Letter names starting with short vowel sound when pronounced:

  • f = /ef/
  • l = /el/
  • m = /em/
  • n = /en/
  • s = /es/
  • x = /eks/
  • r = /ar/ — not exactly a short vowel sound, but close

Letter names with long a sound when pronounced:

  • j = /jay/
  • k = /kay/

Letter names with long e sound when pronounced:

  • b = /bee/
  • c = /see/
  • d = /dee/
  • g = /jee/
  • p = /pee/
  • t = /tee/
  • v = /vee/
  • z = /zee/

Letter names with pronunciatons not using their letter sound:

  • h = /aych/ —  the letter sound is pronounced /h-h-h/
  • q = /kue/ — the letter sound is /kwuh/
  • w = /double u/ — the letter sound is pronounced /wuh/
  • y = /why/ — the letter sound is pronounced /yuh/

The article on Alphabet Research I referenced above has some excellent instructional guidelines for introducing and teaching the letter sounds. If you are a “letter of the week” teacher, this may shed some light on what newer research has revealed.

Here are some good strategies for vowel and consonant instruction in the classroom. Please share some of yours that aren’t on my list!!

  • Check out Kate Garner’s “Secret Stories.”  https://www.katiegarner.com/ She has a fantastic approach to help students notice what their mouth is doing when saying a sound and links it to fun phrases and actions.
  • POST an alphabet chart in the classroom which includes pictures, big enough to be seen across the room.  A good thing to look for is one that has 2 pictures for the vowels, or has the vowels in a different color. To me, this is a MUST in pre-K, KG and first grade classrooms. A poster close to your group teaching station is also highly recommended for easy, quick reference.
  • Here’s a desk alphabet chart that is handy for use at your small group station. FREE alphabet chart from TPT (Mrs. Ricca’s Kindergarten)
  • Learn letter formation steps that can be repeated. Here’s an idea from Pinterest: Lower case letter formation rhymes and Uppercase rhymes for letter formation
  • Provide lots of alphabet books in the reading center for individual reading time.
  • Learn the sign language finger spelling for letters of the alphabet. Here’s a link: ASL Finger Spelling Charts
  • Match upper and lower case letters.
  • Match pictures (beginning sounds) with letters.
  • Do picture sorts with 2-3 letters/sounds at a time.
  • Use object sorting tubs.
  • If working on 2 sounds at a time, give children those 2 letters on cards or with letter tiles. Teacher says the word or shows a picture and the students must descriminate between the two to hold up (all students engaged).
  • In shared or guided writing, have children supply the beginning consonant or vowel sound instead of the teacher writing. Example:  If writing the sentence We will go to the library today, the teacher could get students to help with spelling parts of the words (the w, l, t and perhaps the e, i, o  in we, will, and go).
  • Look for particular vowels and consonants in short poems (see Phonics Part 1 for resources).
  • Make alphabet books.  These could be individual or a class big book which can be viewed over and over again during center time.
  • Refer to one of my favorite bloggers / TPT authors for young children (This Reading Mama): https://thisreadingmama.com/teaching-letter-sounds/
  • Making letters with play-dough or in an art related activity should always be connected with pictures and sound practice so students can connect the sound to the letter.

Finally, using knowledge of beginning letters along with picture cues can help a child read easy texts and verify the correct word was used. Here are two examples:

  1. Look at the ______.  If a child only looks at the picture, it might be read as “Look at the rabbit.” But asking the child to confirm by looking at the first letter should reveal the word can not be rabbit because the word shown begins with the letter b.
  2. I can see my _______. If a child only looks at the picture, it might be read as “I can see my coat.” But asking the child to confirm by looking at the first letter, and prompting the child like this:  “What else could that word be that begins with the /j/ sound?” If the child does read the word jacket correctly, the teacher could ask the child, “How did you know that word wasn’t coat?” This would enable to you to determine if the child was using first letter clues, or just guessing.

Happy Reading!!

Reading Routines Part 5: Phonics

by C. Elkins, OK Math and Reading Lady

Research supports the fact that explicit systematic phonics instruction is highly beneficial to students. In other words, phonics instruction should make up part of the daily reading routine . . . especially in primary classrooms. Here is Reading Rockets take on the Alphabetic Principle: “Alphabetic principle is the idea that letters and letter patterns represent the sounds of spoken language. It differs from oral language and phonemic awareness because it is introducing students to letters and incorporating what they have already learned (sounds). It is showing them that the sounds they have learned have letters and can all be put together.” Here’s some more info from RRockets on this subject: Alphabetic Principle

Phonics instruction starts with matching letters with sounds as well as naming the letter. Here is a summary I wrote regarding some  fantastic research on alphabet learning (to change from the former letter-of-the-week method): Alphabet Letter / Sounds Research

  • Some of the most significant parts of the research for me was the realization that saying the letter name results in a variety of added vowel sounds such as short e sounds /em/ = m; /ef/ = f; or sometimes a long a /kay/ = k; /jay/ = j; or sometimes long e /dee/ = d; /tee/ = t; or something all together different such as /aich/ = h; /double u/ = w.
  • Sometimes the letter name is close to the sound assigned to it, and sometimes it’s not.
  • The research provides some evidence that letter of the day instruction with 5 to 6 cycles of instruction was very beneficial. Each cycle had a different focus such as letters common in the students’ names, most frequently used letters, by the ways letters are formed, etc.

In my last post on phonemic awareness (see Reading Routines Part 4), I shared the progession from sound boxes to letter boxes and included a couple of good videos. These are very helpful with cvc words and other one syllable words. The goal in all of this is to move from letter-by-letter sounding out to continuous blending and chunking.

So what do explicit phonics instructional programs look like? Although not set in stone, there is usually a progression of skills that look similar to this:

  • Letter and sound matching
  • CVC with short vowel practice
  • CVCe with long vowel practice
  • Beginning consonant blends
  • Beginning consonant digraphs
  • Vowel pairs
  • R controlled vowels
  • Vowel diphthongs
  • Multi-syllablic words

Starting in 2nd grade, the emphasis is more on the vowel patterns (such as different ways to spell the long a sound) as well as consonant combinations, both beginning and ending (such as ck, ng, str). Grades 3 and above focus on these as well, but improve and apply to multi-syllablic words. Most textbooks have a daily phonics lessons to help you keep your instructional explicit and systematic.

These are at the core of all phonics instructional programs:

  • Connecting phonics instruction to weekly spelling patterns and learning centers helps students practice a specific set of words and apply the skill to other similar words.
  • Moving away from sounding out words letter-by-letter to try continuous blending and chunking (by looking for common parts or patterns)
  • Using knowledge of one syllable words to apply to multi-syllablic words
  • Relating known words to new words (often called an Analogy Strategy). Here is an example I used with a 5th grader recently who was trying to read the word “wren” in a portion of text. Obviously this bird species is not well known, and the context didn’t help her with the pronunciation.  I just simply wrote the word “write” on my little white board because I was positive she knew it – and she recognized it immediately. Then I said, “Use what you know about this word (write) to help with the word in your text.” She was able to make the analogy quickly! I didn’t have to go into a phonics lesson on how to pronounce words with wr, etc.

Your phonics instruction is strengthened via fix-it strategies which are embedded in your day-to-day teaching situations (guided reading, etc.). Here is a link to my fix-it-strategies post: Decoding fix-it-strategies Continue reading

Alphabet Letter and Sounds Research

by C. Elkins, OK Math and Reading Lady

I was browsing through some research on reading and came across this article about instructional practices concerning alphabet letters and sounds. Click here for a pdf of this article: Enhancing alphabet knowledge instruction: Research implications and practical strategies for early childhood educators.

This article discusses the concept of letter-0f-the-week instruction vs. another researched method. I know many KG teachers who implement the letter-of-the-week method with great success. During most of my teaching career, I know this was a pretty common method – even my own children learned this way. However, as research became more prevalent and relied upon to make instructional decisions, this method of teaching one letter a week came under fire. I kept hearing this, but never read any research which supported it, refuted it (or advised what to do instead) until seeing this article. So please have an open mind KG and 1st grade teachers. I like this quote by Maya Angelou: “Do the best you can until you know better. Then when you know better, do better.”

Here is a summary of the article:

  1. The letter-of-the week method is largely based on tradition rather than research.
  2. With a letter per week, it takes 26 weeks of school (often until March) to complete the cycle, which disadvantages at-risk students.
  3. Many students don’t need a whole week to learn a letter.
  4. With 26 weeks for one complete instructional cycle of the alphabet, this only leaves 10 weeks to review the letters, sounds, and symbols.

The research suggested the following 6 cycles of alphabet learning (meaning each cycle is completed in 26-30 days) and repeated with a different focus for up to 5 more times throughout the year. With each cycle,  the order and reason in which letters are presented is varied. So students experience 6 different opportunities (instead of one) to focus on unique features of the letters to learn the letter name, sound, how to write it, and locate it in text.

1st 26 days: By frequency of initial letters in students’ names. Determine the letters used most often in your students’ names and start with those first. Example:  You have several students whose name begins with M, L, and K. So begin with those letters with your daily instruction. This is very motivating for students and helps with name recognition. Continue reading