Reading Routines Part 5: Phonics

by C. Elkins, OK Math and Reading Lady

Research supports the fact that explicit systematic phonics instruction is highly beneficial to students. In other words, phonics instruction should make up part of the daily reading routine . . . especially in primary classrooms. Here is Reading Rockets take on the Alphabetic Principle: “Alphabetic principle is the idea that letters and letter patterns represent the sounds of spoken language. It differs from oral language and phonemic awareness because it is introducing students to letters and incorporating what they have already learned (sounds). It is showing them that the sounds they have learned have letters and can all be put together.” Here’s some more info from RRockets on this subject: Alphabetic Principle

Phonics instruction starts with matching letters with sounds as well as naming the letter. Here is a summary I wrote regarding some  fantastic research on alphabet learning (to change from the former letter-of-the-week method): Alphabet Letter / Sounds Research

  • Some of the most significant parts of the research for me was the realization that saying the letter name results in a variety of added vowel sounds such as short e sounds /em/ = m; /ef/ = f; or sometimes a long a /kay/ = k; /jay/ = j; or sometimes long e /dee/ = d; /tee/ = t; or something all together different such as /aich/ = h; /double u/ = w.
  • Sometimes the letter name is close to the sound assigned to it, and sometimes it’s not.
  • The research provides some evidence that letter of the day instruction with 5 to 6 cycles of instruction was very beneficial. Each cycle had a different focus such as letters common in the students’ names, most frequently used letters, by the ways letters are formed, etc.

In my last post on phonemic awareness (see Reading Routines Part 4), I shared the progession from sound boxes to letter boxes and included a couple of good videos. These are very helpful with cvc words and other one syllable words. The goal in all of this is to move from letter-by-letter sounding out to continuous blending and chunking.

So what do explicit phonics instructional programs look like? Although not set in stone, there is usually a progression of skills that look similar to this:

  • Letter and sound matching
  • CVC with short vowel practice
  • CVCe with long vowel practice
  • Beginning consonant blends
  • Beginning consonant digraphs
  • Vowel pairs
  • R controlled vowels
  • Vowel diphthongs
  • Multi-syllablic words

Starting in 2nd grade, the emphasis is more on the vowel patterns (such as different ways to spell the long a sound) as well as consonant combinations, both beginning and ending (such as ck, ng, str). Grades 3 and above focus on these as well, but improve and apply to multi-syllablic words. Most textbooks have a daily phonics lessons to help you keep your instructional explicit and systematic.

These are at the core of all phonics instructional programs:

  • Connecting phonics instruction to weekly spelling patterns and learning centers helps students practice a specific set of words and apply the skill to other similar words.
  • Moving away from sounding out words letter-by-letter to try continuous blending and chunking (by looking for common parts or patterns)
  • Using knowledge of one syllable words to apply to multi-syllablic words
  • Relating known words to new words (often called an Analogy Strategy). Here is an example I used with a 5th grader recently who was trying to read the word “wren” in a portion of text. Obviously this bird species is not well known, and the context didn’t help her with the pronunciation.  I just simply wrote the word “write” on my little white board because I was positive she knew it – and she recognized it immediately. Then I said, “Use what you know about this word (write) to help with the word in your text.” She was able to make the analogy quickly! I didn’t have to go into a phonics lesson on how to pronounce words with wr, etc.

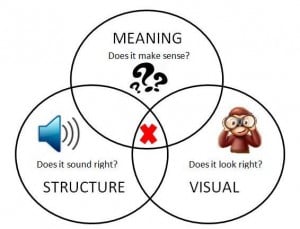
Your phonics instruction is strengthened via fix-it strategies which are embedded in your day-to-day teaching situations (guided reading, etc.). Here is a link to my fix-it-strategies post: Decoding fix-it-strategies Continue reading

Reading Fix-it Strategies: Part 3 “Does it look right?”

by C. Elkins, OK Math and Reading Lady

Welcome back to part 3! In this post we will look at some strategies and prompts regarding the visual cueing system. When a student’s main strategy is to use the letters they see to sound out words, they are attempting to make the word(s) look right. This method is often helpful, especially with cvc words or words which are phonetic. We do want kids to know how to segment the sounds and blend them together to pronounce the word. But we don’t want them to overuse it and neglect the other 2 cueing systems. A good reader uses all 3 at the same time to cross check their reading.

If we want children to use the visual cueing system, there are several “sounding out” strategies. Children often need guidance about which of these works best. So try not to just say, “Sound it out.” This  guide emphasizes many of these strategies. Get it here FREE:  Strategy Chart full size.

  • Sound out letter by letter:  To pronounce had = /h/+/a/+/d/
  • Get the word started with the right sound.
  • Stretch out the sounds slowly (also referred to as continuous blending).
  • Use common chunks (sometimes referred to as rimes, phonograms, word families): spent = /sp/ + /ent/
  • Look for little words within bigger words: stand = /st/ + /and/
  • Flip the vowel:  If a student tried the word time, but pronounced it /t/+/i/+/m/ with the short i sound, tell the child to flip the vowel (meaning they should try the other sound that vowel makes to determine if it makes sense). This is a GREAT strategy to use without having to go into a mini lesson about vowel pairs, silent e, and other phonics rules concerning vowels.  Just say, “Flip the vowel.”
  • Think of another known word which has a similar spelling: If the child is trying to read the word were think of the word her. Trying to read the word tree? Think of the word see.

Continue reading

Reading Fix-it Strategies: Part 2 “Does it sound right?”

by C. Elkins, OK Math and Reading Lady

In part 2, I will focus on some more fix-it strategies for students who are neglecting structure/syntax when reading. Last week were fix-it strategies regarding meaning. Next week will feature strategies for visual errors.

Let’s say this is the text:  She looked in her desk to find a pencil.

Let’s say this is how he/she read it (and did not fix it):  She look in her desk to find a pencil.

This child is making a structural / syntax error. Most of these types of errors occur with verbs in which children use the wrong tense or leave off/add endings. This should cause the child to stop and fix it because it doesn’t sound quite right. But that doesn’t always happen.  Why?

  1. The child is so focused on the base or root word, they don’t notice that endings have been added.
  2. The child is not listening to them self.
  3. The child can not always distinguish between proper and improper speech – perhaps because they don’t hear correct English at home, or they may be an English language learner and haven’t had a lot of exposure to correct grammar.
  4. The child is making generalizations regarding verb tense and doesn’t know all of the variations. The child doesn’t honestly know to make something “sound right.”
    • For example: Most often the child knows to add -ed when speaking about a past time event (jump / jumped). But what about run or write?  It’s not runned or writed.
    • Or while they might see the -ed ending, they don’t always know which is the correct pronunciation (is it /ed/, /t/, or /d/??).
    • The child does not yet know all of the grammar rules regarding participles and irregular verbs – perhaps due to developmental level or hearing incorrect language use among peers or family.

No matter the cause, it is our job as the teacher to try to help a child self-monitor and fix these types of errors. So there are prompts that are often effective to help a child recognize and correct their reading when it doesn’t sound right. Continue reading

Reading Fix-it Strategies: Part 1 “Does it make sense?”

by C. Elkins, OK Math and Reading Lady

What strategies do your students use to fix their reading? As teachers, we want our students to recognize when something doesn’t look right, sound right, or make sense — and FIX IT! But, do they use the same strategy over and over again — or worse — not even try to fix a mistake? This post will begin a series about good fix-it strategies (for any age reader) and prompts teachers can use to encourage students to use them. Keep reading for a FREE prompting guide, poster, and bookmark to use in your classroom.

The fix-it strategies I will share are based on the three cueing systems in reading: Meaning, Structure, and Visual. When students make errors in their reading, the errors fall into one of these 3 categories. 

In this post, I will focus on the MEANING system, which in my opinion is the most important one. After all, the ultimate goal in reading is to comprehend or make meaning. When a reader comes to a hard word, is he/she only trying to sound it out? Or are they thinking about what makes sense and sounds right? Hopefully, a little of each. A good reader looks at the letters, combined with the structure and meaning of the story to decide what that tricky word could be.

I’m sure you are familiar with this scenario.  A child sees this text:  She went to the store to get some milk. But, the child reads it as:  She went to the story to get some milk. And the child keeps on reading, oblivious to their mistake. After all, the word does look like story.

Which one of these prompts do you think will help the child fix their reading most efficiently? Continue reading

Writing Part 6: Mini Lessons

by C. Elkins, OK Math and Reading Lady

Thanks for hanging in there regarding my Writing series.  Today I will focus on using writing mini-lessons. The mini-lesson is the teacher’s chance to show children how to do all of the different things writers do — a little bit at a time.

Writing Mini-Lessons:

  • Mini-Lessons are meant to be short  – maybe 10-15 minutes.
  • They are meant to address student needs – so your decisions shouldn’t necessarily come from a sequenced list, but based on what you see the students doing (or not doing).
  • Focus on one topic per mini-lesson. Then practice that one aspect of writing.
  • Decisions on mini-lessons can be based on any writing students are doing (journal, prompts, reading responses, and other curriculum writing assignments).
  • How often? I would try 1-2 mini-lessons per week. Alternate days with handwriting instruction and journal writing if you only have one block of time for writing.
  • Writing mini-lessons can also be done as a part of your guided reading weekly routine. This means you can differentiate your instruction based on the group of students with whom you are working.
  • Always model and use think alouds. Your writing mini-lessons will be more effective if you have already been utilizing shared writing methods. Use some of your own writing to introduce a mini-lesson.
  • Don’t forget to praise when you notice a student who has implemented some of your mini-lesson strategies.  Give specific info to a student directly. Specific praise (not just “Good job”) will result in more consistent use of what you praised them for. Example:  “I noticed you have ending punctuation on all of your sentences. Keep it up!” 

Mini-Lesson Ideas: These are not listed in any particular order because you should select ones based on what students need. However, I did put them in a somewhat developmentally appropriate order from younger to older students.

Get your free printed PDF copy of these ideas (enough for a whole year) by clicking HERE. Continue reading