Reading Routines Part 4: Phonemic Awareness

by C. Elkins, OK Math and Reading Lady

This is Part 4 of a series about daily reading routines I recommend. Previously we have looked at read alouds, independent reading, and phonological awareness. Today’s focus is Phonemic Awareness. Some videos and freebies via TPT are linked below.

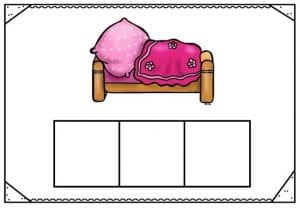
See link #3 below for FREE task cards from TPT

Phonemic Awareness is under the umbrella of phonological awareness. This encompasses pre-reading skills associated with the sounds of language. Phonemic awareness is the part dealing with individual phonemes and how they can be identified, segmented, blended, and manipulated to create recognizable units or words . . . . the auditory portion. Students need a firm foundation with this aspect before they can adequately apply it to phonics and reading (which is where the visual aspects of the letters that make these sounds appears). So here are some basics about phonemic awareness:

  • Phonemes are the basic sound units. In the English language there are 44 of them (the consonants, the vowels, digraphs, etc.). Here is a good, short list from Orchestrating Success in Reading by Dawn Reithaug (2002).: 44 Phonemes However, if you want to go more in depth, then this link should satisfy your curiosity (or make you want to quit teaching spelling) from The Reading Well44 Phonemes in Detail
  • Onsets/rimes:  The onset is the part of the word before the vowel. The rime is the part of the word including and after the vowel. Examples: In the word shop, /sh/ is the onset and /op/ is the rime. In the word bed, /b/ is the onset and /ed/ is the rime.
  • Identifying: When presented with a word orally, can a student identify the beginning sound or ending sound? Example: What is the beginning sound in the word moon? /m/.  What is the last sound in the word jump? /p/. The brackets are used to represent the sound – the child is not asked to name the letter.
  • Segmenting: When presented with these words, can a student take the parts or individual sounds apart orally (segment)? Examples: bed = /b/ + /ed/ or /b/ + /e/ + /d/.  Students would NOT be asked at this point to identify the letters that make those sounds, just the sounds.
  • Blending: When presented with these sounds, can a student put them together orally (blend) to form a word?  Examples:  /k/ + /at/ = cat; or /sh/ + /o/ + /p/ = shop
  • Manipulating:  This involves adding, deleting, or substituting sounds. Example:  What is /ap/ with /m/ added to the beginning? (map). What is /land/ without the /l/ sound? (and).  Change the /b/ in bed to /r/. . . (red).

Daily teaching routine for Phonemic Awareness:

  1. If using a reading series, check to see if there is a daily practice with words (like the examples above). Just a few minutes with the whole class is a good introduction and chance for you to observe / listen to who is or is not grasping these tasks.
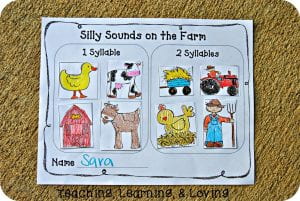
  2. Use simple pictures (such as fox): Ask students to do some of the following when you feel they are ready:
    • Name the picture and tell the onset and rime. /f/ + /ox/
    • Orally say all of the separate sounds /f/ + /o/ + /ks/.  Use the length of your arm for these cvc words: tap shoulder and say /f/; tap inside elbow and say /o/; tap the wrist and say /ks/.  Then run your hand along the whole arm to blend them back together.
    • Use an Elkonin sound box to show the distinct sounds. For fox, use a 3-part box. Push a chip into each box as each sound is being made (no letters yet, just chips, beans, cubes, pennies, etc.). Then blend all the sounds together. (I like to put an arrow at the bottom of the boxes and run my finger along it to remind students with a visual that the last step is to blend the sounds together.)
    • Change the /f/ to /b/. What word does that sound like? /b/ + /o/ + /ks/ = /box/
    • Change the /ks/ to /g/. What word does that sound like? /f/ + /o/ + /g/ = /fog/
    • Change the /o/ to /i/. What word does that sound like? /f/ + /i/ + /ks/ = /fix/
    • If you remove the /f/ sound, what is left? /oks/ or /ox/
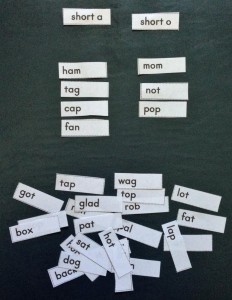
    • Be sure to use short and long vowel words, digraphs, etc. because it’s all about hearing the separate parts – not about matching up the letters that make those sounds.
  3. Follow up these same routines during guided reading and work station time. Here are 2 links from TPT (FREE) with some great sound box practice opportunities:

Here is a great short video I recommend regarding the Elkonin sound boxes: Sound boxes

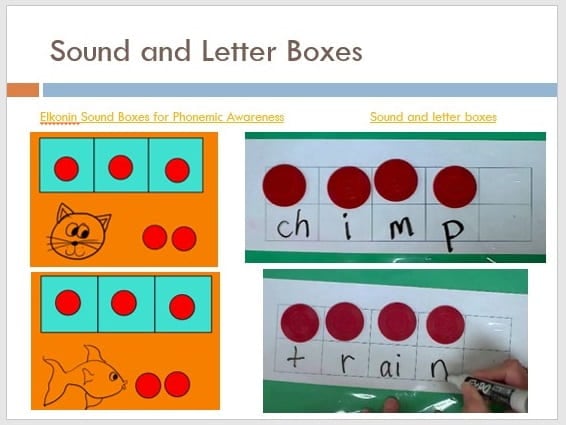
When you are ready to progress from sound boxes to letter boxes, these two videos should be very helpful.

These routines will be very important once you feel they are ready to associate the letter(s) that make these sounds (via phonics, spelling, and writing). A phonics routine will be the next topic. So stay tuned!

Reading Routines Part 3: Phonological Awareness

by C. Elkins, OK Math and Reading Lady

Daily explicit routines regarding phonological awareness and phonics are important, especially for KG-2nd grade levels (and beyond for those who are in need of extra intervention). Whether you are utilizing the textbook’s recommended lesson plan or seeking out on your own, I’d like to advocate for a daily routine to teach and/or practice these skills. In this post, I will focus mostly on teaching early phonological awareness routines and how they are connected to later reading, spelling, and writing success.

Phonological Awareness encompasses pre-reading skills associated with the sounds of language. If you have assessed this at the PreK-2nd grade levels, you know part of the assessment involves identifying spoken words, rhymes, syllables, onsets/rimes, and identifying, segmenting, blending, and substituting phonemes. Phonemic awareness is under the umbrella of phonological awareness with more of a focus on the latter part (onsets/rimes, and identifying, segmenting, blending, and manipulating phonemes). All of this, regardless, is based on SOUNDS only. This awareness is AUDITORY and not print related.

My opinion regarding this daily routine, is for a whole class explicit 10-15 minute lesson. During the whole class daily routine, keep mental tabs or quick notes on who has difficulty so you can follow up during small group and learning station opportunities throughout the week. Try video taping your routine for those “extra eyes.” See a link to some FREE research-based activities at the end of this post.

Spoken Words: 

I have observed frequently that young students do not always know the difference between letters, words, and sentences. I usually discover this via writing lessons. Wonder why students don’t space between words? Or spread letters within a word far apart? I think it may go back to a misunderstanding about this very basic phonological awareness concept.

The assessment for this involves the teacher stating a sentence and the child pushes chips or pennies to indicate how many words were heard. Usually this isn’t too difficult until the teacher utters a 2-syllable word. Does the child understand this to be one or two words?

Believe it or not, this is a huge key concept later when the child is reading text. You may discover errors with 1-to-1 correspondence. When reading this sentence: “The apple is good.” does the child keep their finger on apple until the word is finished, or do they move their finger for each syllable? And then, as mentioned previously, it also becomes a hindrance when writing.

As you can see then, concept of spoken word is closely tied to the understanding of syllables. The number of syllables per word is determined by the number of vowel sounds heard. Friend = 1 syllable. Funny = 2 syllables. There are several ways to count them:

  • Clap or snap each syllable
  • Count with fingers
  • Feel the jaw move

Why is knowledge about hearing syllables important to later reading skills?

  • Breaking apart words by syllables is an important reading strategy. Can the child visually see the syllable and then pronounce each part as if it was a little word (example: yes-ter-day).
  • Breaking apart words by syllables is an important spelling and writing strategy.  Hearing the sounds of the word is just as important as the visual aspects of the word. Trying to spell the word important? Can I hear the parts /im/ + /por/ + /tant/? If I can hear them, I can come closer to spelling them.

Daily teaching routine for Spoken Word and Syllables:

  1. Present a sentence orally. Step 1:  Students repeat the sentence. Step 2: Have them do one of the following to indicate # of spoken words:  clap, stomp, use magnetic chips on a the board, unifix cubes, count with fingers, or select a # of students to match the # of words and they each stand to say one of the words in the sentence – they become the sentence.
  2. State a word and have students clap, snap, or count # of syllables.
  3. Hand out picture cards and have students group together by # of syllables.

Rhyme: Continue reading

Reading Routines Part 2: Independent Reading Time

by C. Elkins, OK Math and Reading Lady

This is part 2 of a series about reading routines I believe are important. The focus in this post will be on establishing a daily independent reading time. This independent reading time (or partner reading) will help extend some of the benefits of your read aloud routine.

According to Houghton Mifflin, “Research into effective literacy instruction has often noted that the best teachers of reading have an extensive collection of books in their classrooms (Allington & Gabriel, 2012; Morrow & Gambrell, 1998; Reutzel & Fawson, 2022). In large-scale national studies, researchers found that students in more effective teachers’ classrooms spent a larger percentage of reading instructional time actually reading; additionally, exemplary teachers were more likely to differentiate instruction using their book collections, so that all readers had books they could read accurately and fluently, with understanding and motivation (Allington & Gabriel, 2012).” This comes from an excellent, easy read from Houghton Mifflin Harcout: The Value of Independent Reading: Analysis of Research

What are the benefits? The child . . .

  • Gets a choice in what he/she reads.
  • Is able to practice concepts of print.
  • Is exposed to a wide range of books. This exposure is important in motivating children to read. I’m a strong believer that a child who doesn’t read just hasn’t found the right book / type of book yet.
  • Has the chance to make connections (with characters, places, situations).
  • Can explore all types of genres to include fairy tales, poetry, fantasy, and non-fiction.
  • Becomes more fluent when rereading a favorite book.
  • Increases vocabulary and comprehension.
  • Is able to apply knowledge about sight words and reading / decoding strategies at their own pace.
  • Becomes more confident, experienced, and committed.
  • Builds background knowledge.

Other ways to extend the benefits of independent reading time:

  • Check out the Daily 5 routines to get started. Here’s a summary:
    • Independent reading requires stamina. Start out with a brief time and observe when students start to get restless (5 minutes??) Then gradually add time, always taking cues from the students about how long is too long? Of course the optimum time is based more on age / grade level. But I would recommend you aim toward a goal of 15-20 minutes per day (more for older students).
    • What does independent reading look like? Which books can they choose? How to get them out and put them away. Where can I sit? What if I didn’t finish my book and want to keep it a little longer? If I don’t know the words yet, can I just look at the pictures?
    • How to choose a “just right book.”  Independent reading is most beneficial when a child chooses a book they can read, but we have to be careful not to make it too regimented and requiring only certain levels. A “just right” or “good fit” book is not too hard, not too easy, is on a topic you enjoy, and you can read most of the words.
    • Check out the Daily 5 / Daily Cafe links at the bottom of this blog.

      Anonymous source from Microsoft Clip Art

  • Periodically allow students to share something about a book they like (a book talk) to perhaps interest others. This could be while students are in a circle, or just a couple of students each day.
  • How about partner reading? This might be helpful with reluctant or new students to show them the procedures. Or a once-a-week treat.
  • For intermediate students (grades 3-5), be sure they have extra time to peruse / try out a book. The cover can entice them, but once they start reading, they need permission to trade for another if it doesn’t grab them. Also consider book clubs. This is when 2-3 students read the same book and have the opportunity to engage in discussion about their book.
  • Allow a classroom book to go home via a check out bag.
  • Make up special take home bags for special occasions (birthday, holiday, etc.).  I had two rotating bags that were sent home. My classroom name was “The Magical Mice.” One bag was painted with cute mice. Several books with a mouse theme (fiction and non-fiction) were included. A book log was included which included mouse poems and notebook paper for the child and/or parents to write a note. I even had a recipe to make mouse-shaped cookies in the bag. The student of the week got to take it home and keep it for the week. The other bag was for birthdays and included similar items with a birthday themed stories.

Thank you, Mrs. Seely!!

How to organize your classroom library to help your routine go smoothly:

  • Sort books into categories and label (using small easy-to-carry tubs). Find child-accessible shelves to keep them within reach. For PreK, KG, and 1st grade, consider labels with pictures also. Here’s a link to TPT for free and $ book labels: TPT Classroom Library Book Category Labels
  • If students’ desks are grouped together, rotate some tubs daily so students don’t have to leave their seats to get books. We all know this can get out of hand if students are constantly getting up.
  • Daily 5 suggests that each child have their own book collection box using a cardboard magazine holder (or you can cut an empty cereal box and cover with contact paper). Their box contains their school library book, leveled books, guided reading book, and free choice books they are reading. This might also be a great place to keep their writing journal (another reading routine I will blog about soon).
  • If not using the individual boxes (above), think about what you want to happen when independent reading time is over and a child wants the chance to finish their book. I had a small tub for each group. The student would put their personalized, laminated bookmark in the book to claim it for the next independent reading time. This valued their right to finish a book they had become engrossed in without someone else “stealing” it.

What are you as the teacher doing during this independent reading time?

  • You can enjoy your own book to model independent time.
  • This might be a good time to listen to individual children read to you (not a whole book, but just a few pages). It will build the teacher / child relationship and allow you to monitor and assist them with strategies.
  • Less desirable, but often necessary —  time for some independent assessments (for new students, at the end of the quarter, etc.

Some recommended links to launch your independent reading time:

Have a great week! Tell us about your independent reading routine!


Reading Routines Part 1: Read Aloud

by C. Elkins, OK Math and Reading Lady

Read aloud time is an important daily routine (for PreK – 5th).  It’s not just for primary students. According to an article in Reading Rockets (https://www.readingrockets.org/article/reading-aloud-build-comprehension), Reading aloud is the foundation for literacy development. It is the single most important activity for reading success (Bredekamp, Copple, & Neuman, 2000). It provides children with a demonstration of phrased, fluent reading (Fountas & Pinnell, 1996). It reveals the rewards of reading, and develops the listener’s interest in books and desire to be a reader (Mooney, 1990).

What are the benefits?

  • Teacher models good reading (not an internet book)
  • Reading is for enjoyment – so this is a story outside of the assigned reading curriculum for the week
  • There are great books available to spark the imagination and provide motivation to read
  • Students get practice making mental pictures (when listening to a chapter book)
  • Enhances listening comprehension
  • Vocabulary can be introduced in an informal way
  • Students learn about the author’s voice and point of view
  • Books can be compared (author, characters, genre)
  • Characters can be explored deeply if reading a series by the same author
  • Great comprehension skills to reflect on informally:  predict, cause-effect, sequence, compare-contrast, inference, theme
  • A calm atmosphere
  • Students feel more free to discuss aspects of the read-aloud (because there aren’t worksheets or tests involved)
  • Able to listen to books above independent reading level
  • Builds connections and classroom community (Example:  “This is a book about . . . .  What experience have you had with this?”)
  • Got a problem to solve (Friendship, etc.)? You can probably find a book about that topic
  • Younger students learn valuable concepts of print by participating in the shared reading of a big book

I know this precious read aloud time is often omitted due to tight schedules. If so, please examine your schedule to see if you can shave a little time in other places to include this important routine. Here’s a great article about ways to fit read-aloud time into your busy schedule: https://www.scholastic.com/teachers/blog-posts/juan-gonzales/17-18/3-ideas-on-how-to-create-more-read-aloud-time-the-classroom/

At the beginning of the year when you are establishing procedures, be sure to make an anchor chart for read aloud expectations.  Refer to the Daily 5 for great ideas. Things to consider:

  • Will children be on the floor or at their desks?
  • Will you allow doodling while you read? (There are differing opinions on this.)
  • How will you handle blurting (or not blurting) and discussion time?
  • Videotape yourself to analyze your reading — Do you enjoy listening to yourself?  If your voice sounds varied and interesting, your students most likely will be actively listening (rather than disrupting or falling asleep).
  • Choose books which encourage mental visualization. Check with your librarian if you need some advice.
  • With chapter books, choose those with interesting characters and riveting chapter endings (makes studens eager to listen the next day).

Final research note: The U.S. Department of Education Commission on Reading took into account over 10,000 studies and found that the most important activity for building the skills and background for eventual success in reading is reading aloud to children (see Anderson, Hiebert, Scott, & Wilkinson, 1985). Children who are read to are usually the very best readers in the classroom, and they acquire large vocabularies, write well, and do better in other subject areas, as well.

What are your favorite read-alouds? Please share! (indicate grade level range too)

Some of mine for 2nd-4th graders:  A Toad for Tuesday (by Russel Erickson), the Flat Stanley books, Snot Stew (by Bill Wallace)

Text Structures Part 3: Sequence and Descriptive

by C. Elkins, OK Math and Reading Lady

Welcome back to the third text structure post.  Today’s focus will be on sequence / chronological order and descriptive text structures. Here are some graphic organizers to keep in mind.

Sequence / Chronological Order

1. Sequence refers to a particular order in time. This can be:

  • Information presented minute by minute, hourly, weekly, monthly, yearly, etc.
  • Providing information by dates (a timeline)
  • Steps of how to complete something (first, second, third, etc.)
  • A retelling of events in the order they happened: First, next, then, finally or beginning / middle / end.  It may be helpful to use a “retelling rope”.   Use a section of rope or nylon cord (approx. 1 foot long). Tie several knots along the length of it (3-5). At each knot, retell part of the story or events in sequence.
  • Observing how things / people have changed over time
  • Non-fiction and fiction selections
  • Arranging events in order using pictures

2. Connecting sequence to strategies:

  • Predict what will happen next in the sequence.
  • Visualize the steps involved.
  • Make personal connections regarding your own experience with the sequenced topic.

3. Sequence / Chronological order main idea / summarizing sentence frames:  Suppose I read an article telling about the seasonal journey of a pod of whales.  Again, the topic is whales — but this is NOT the main idea.

  • (Main idea):  Whales travel to different locations each season to find food and a mate.
  • How to ________ step by step.
  • The timeline of _________________.
  • There are several steps to ______________. First, _________. Then, ___________. Last, ________.
  • The life cycle of __________.
  • Many things happened during _____________’s life.
  • (Summarize): Whales travel to different locations each season to find food and a mate. In the spring, they ________. In the summer, ______________.  In the fall, _____________. In the winter, _________.
  • To make ________, follow these steps: ________________.
  • The life cycle of a ___________ includes these stages: _______________.
  • Many things happened during _____________’s life. In (year), he/she_____________. After that, _____________. Then, ________________. Finally, ___________________.

Descriptive Text Structure

1. Descriptive structures give details.  These can be:

  • Details or descriptions about a person, a place, a thing, an idea, an animal, an event, etc.
  • A web graphic organizer is a good model to visualize, with the topic in the center and the supporting details branching outwards.

2. Connecting to strategies:

  • Visualize what is being described, especially if there are no pictures or photos in the text.
  • Ask questions about the topic such as:  “I wonder . . .”
  • Analyze the point of view:  What is the author’s point of view. Is he/she presenting a one-sided view of the details presented?
  • Make connections to the topic.

Continue reading

Comprehension: Point of View

by C. Elkins, OK Math and Reading Lady

Point of View seems to be a difficult skill for children to master. I have noticed it is high up on most schools’ lists of standards that need retaught and reviewed. So this made me wonder, “What is it about this skill that is being misunderstood?”

Here are my thoughts:

  • Part of it may be trying to determine “Which points of view are my students supposed to know?” In Oklahoma, the standards are fairly clear for grades 2-4 which emphasizes the ability to identify the first and third person points of view. But 5th grade isn’t as specific so many teachers are left wondering, “Do I include the 2nd person point of view? The Omniscient? . . .” (See a list below of the Pt. of View Stds. for each grade level. It appears they have clarified the 5th grade position since last year.)
  • Some of the confusion may be that students are mostly armed with the keywords regarding various points of view (1st = I, me, my; 2nd = you, your; 3rd = him, her, them, they). I have literally seen students counting pronouns and then declare the point of view based on which pronouns they saw the most of. This means they were not really focused on the overall jist of the story and/or were ignoring the fact that a quote using the word “I” doesn’t necessarily make the selection a first person point of view. This is where too much reliance on beautiful anchor charts on Pinterest can perhaps harm your students.  So be cautious!
  • Some of it may be that students confuse all of those words: Purpose, Point of View, Perspective.  Here is a good, short video from Smekenseducation.com which easily explains the difference. Click here to watch: Purpose, Point of View, and Perspective Video
  • Stay tuned for some cool FREE activities (end of post).

Continue reading

Comprehension Strategies (2nd-5th and above)

by C. Elkins – OK Math and Reading Lady

I have been doing some research about the difference between reading skills and reading strategies.  There seems to be a variance of opinions, but basically a reading skill is described as a path to answering certain kinds of questions (cause-effect, compare-contrast, sequence, etc.), while a strategy involves a higher meta-cognitive process which leads to deeper thinking about a text (visualize, question, summarize).  Another way to put it is this:  When reading, I need a strategy to help me understand when and where to apply the skills I have learned.

It probably can be illustrated more clearly using mathematics:  A skill might be adding two double-digit numbers, while different strategies might be these:  using base ten manipulatives, using an open number line, or the partial sums method.  Or soccer:  A skill would be the dribbling the ball (how to position the foot, how close/far to keep it to the player), while a strategy would be how to keep dribbling while keeping it away from the opposing team.

There are also varying opinions about which reading practices are considered strategies.  I like to think of strategies as those that can be applied to any reading text such as: summarize, visualize, question, make connections, predict, infer, author’s purpose & point of view. I need a strategy to help me understand when and where to apply the skills I have learned. Keep reading for more ideas and FREE resources.

Skills seem to be more dependent on the text structure (meaning they only apply to certain texts) such as sequence, compare/contrast, cause/effect, main idea / detail, problem-solution, identify story elements, etc. 

  • To help me visualize (strategy), 
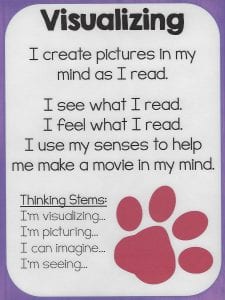
I might use skills about character analysis such as paying attention to their words and actions to help me “see” what is really going on. Another example:  I might use skills about noting details while reading a passage to make the details “come alive” as I try to picture them in my mind. (See link to strategy posters at the end of this post.)

To help me summarize (strategy) an article, I need to analyze the text structure (skill) and then use that information to help me summarize. 

  • Is it in sequence? Then my summary will use words such as first, then, next, last.
  • Is it comparing and contrasting something? Then my summary will need to use words such as alike or different.
  • Is it informational? Then my summary will list facts or details.
  • Is it fictional? Then my summary will tell the characters, setting, and events.

Continue reading

Student Engagement

by C. Elkins, OK Math and Reading Lady

Student engagement is a huge concern among most (if not all) educators. This means students are actively involved in the learning process. Research definitely supports the notion that higher incidents of engagement result in increased achievement (Marzano, etc.).  Attached is my guide to student engagement strategies for reading / ELA lessons.  Many of these strategies also will apply to math, social studies, or science lessons.

Click here to get my guide:  Student Engagement – Whole Class Reading

Reading Fix-it Strategies: Part 4 (Decoding)

by C. Elkins, OK Math and Reading Lady

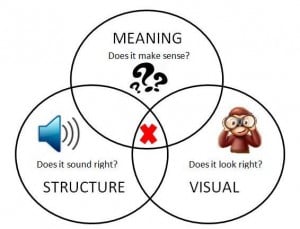
Here are 12 decoding strategies you might like. These show various ways to help students break apart, analyze, and relate to known words. I only recommend sounding out words letter-by-letter in a few limited situations. Beginning readers do this to apply newly learned letter-sound knowledge. It is a successful method for cvc words and other small words which follow the phonics rules. However, if this is the child’s main method of reading, it begins to become unproductive and impede fluency. In addition to prompting students for meaning or use of structure (see Fix-it Strategies parts 1 and 2), try some of these strategies to help children decode words.

  1. Help the child think of a word that makes sense which also begins with that letter(s).alligator
  2. Use the picture and the first letter to help predict the word. Example: The alligator is green. I know it’s not crocodile because the word begins with the letter a.
  3. On a word which can be predicted using the meaning and structure of the story, show a student how to cover up the end of the word (with their finger) to “force” the student to focus on the beginning letter or blend. Or use a post-it note over everything except the first letter or blend. The cloze procedure works well here. For example: “The first time I got on an airplane I was feeling sc_____.” A student probably doesn’t need to even see the rest of the word to predict it says “scared.”
  4. Limit “sounding out” to highly predictable words. Use Elkonin sound boxes for students to “push” sounds of words and then blend them together. Click on this link to see a video of this process: Elkonin Sound Boxes When ready, replace chips with letter tiles.
  5. Use “continuous blending.”  The reader slowly blends the sounds together instead of segmenting one at a time.  Example with cat:  Instead of /k/ + /a/ + /t/ it might sound like /kaaat/.
  6. Show the student how to cover up parts of words to isolate known syllables, base words, or word parts.
    • Candy: look for known word part –and (or can)
    • Jumping: look for base word jump
    • Herself: look for compound words
  7. Help student relate the tricky word to another that is similar (word analogy). If a child is struggling with a word, it is often helpful to write a simple known word (on a handy small whiteboard) to see if they can relate the known to the new.
    • For week: You know we so this word is . . .
    • For star: You know are so this word is . . .
    • For chat: You know cat so this word is . . .
    • For dress: You know yes so this word is . . .
    • For perfect: You know her so this word is . . .
    • For wreck: You know write so this word is . . .
  8. Sometimes a student gets a word on one page and not another. Help them notice when this happens. “You read this word correctly on page 2. What did it say on page 2? Try it here on page 5.”
  9. Teach children to look for chunks and break the word apart. Example: For standing break into /st/ + /and/ + /ing/. Children will learn more of these “chunks” through spelling instruction. Or, make new words using word families so they can see similar chunks, such as: -ame, -ell, – ick, -oat, -ug
  10. Tell the child to “flip the vowel.” This means if they try one sound and it doesn’t make sense, to try the other sound the vowel makes. This is a quick prompt without the teacher going into a mini-lesson on vowel rules. As a visual reminder, I flip the palm of my hand from one side to the other.
  11. For single or multi-syllabic words, practice these generalizations:
    • Closed syllable:  If a single vowel is “closed in” with consonants on each side, the vowel sound is usually short (tub, flat, bas-ket, lim-it, in-spect). This generalization often applies to vc syllables in which the consonant ends the syllable.
    • Open syllable: If a vowel ends the word or syllable, it is considered “open.” In this case, the vowel usually makes the long sound (be, go, be-gin, o-pen, ta-ble, cho-sen)
    • Two vowels in a syllable? Most often the vowel will produce the long sound (this includes vowel digraphs and the vce pattern such as coat, cone, treat-ing).
  12. Practice word sorting, so children can visually discriminate between words /patterns.

For those of you who use Journeys (Houghton Mifflin), you can access word study/spelling cards for sorting only through Think Central. Go to teacher resources, then choose the “Literacy and Language Guide.” Click on the word study link to find them.

As I mentioned in other posts, when the child is reading text let them complete the sentence before prompting for uncorrected errors. This is because the child’s use of the meaning and structural systems are huge. The visual aspect of a word is meant to help them confirm – not drive their system of reading. See previous posts (Fix-it Strategies parts 1-3 and freebies) for more information.

Have a great week!  Cindy

Reading Fix-it Strategies: Part 3 “Does it look right?”

by C. Elkins, OK Math and Reading Lady

Welcome back to part 3! In this post we will look at some strategies and prompts regarding the visual cueing system. When a student’s main strategy is to use the letters they see to sound out words, they are attempting to make the word(s) look right. This method is often helpful, especially with cvc words or words which are phonetic. We do want kids to know how to segment the sounds and blend them together to pronounce the word. But we don’t want them to overuse it and neglect the other 2 cueing systems. A good reader uses all 3 at the same time to cross check their reading.

If we want children to use the visual cueing system, there are several “sounding out” strategies. Children often need guidance about which of these works best. So try not to just say, “Sound it out.” This  guide emphasizes many of these strategies. Get it here FREE:  Strategy Chart full size.

  • Sound out letter by letter:  To pronounce had = /h/+/a/+/d/
  • Get the word started with the right sound.
  • Stretch out the sounds slowly (also referred to as continuous blending).
  • Use common chunks (sometimes referred to as rimes, phonograms, word families): spent = /sp/ + /ent/
  • Look for little words within bigger words: stand = /st/ + /and/
  • Flip the vowel:  If a student tried the word time, but pronounced it /t/+/i/+/m/ with the short i sound, tell the child to flip the vowel (meaning they should try the other sound that vowel makes to determine if it makes sense). This is a GREAT strategy to use without having to go into a mini lesson about vowel pairs, silent e, and other phonics rules concerning vowels.  Just say, “Flip the vowel.”
  • Think of another known word which has a similar spelling: If the child is trying to read the word were think of the word her. Trying to read the word tree? Think of the word see.

Continue reading

Reading Fix-it Strategies: Part 2 “Does it sound right?”

by C. Elkins, OK Math and Reading Lady

In part 2, I will focus on some more fix-it strategies for students who are neglecting structure/syntax when reading. Last week were fix-it strategies regarding meaning. Next week will feature strategies for visual errors.

Let’s say this is the text:  She looked in her desk to find a pencil.

Let’s say this is how he/she read it (and did not fix it):  She look in her desk to find a pencil.

This child is making a structural / syntax error. Most of these types of errors occur with verbs in which children use the wrong tense or leave off/add endings. This should cause the child to stop and fix it because it doesn’t sound quite right. But that doesn’t always happen.  Why?

  1. The child is so focused on the base or root word, they don’t notice that endings have been added.
  2. The child is not listening to them self.
  3. The child can not always distinguish between proper and improper speech – perhaps because they don’t hear correct English at home, or they may be an English language learner and haven’t had a lot of exposure to correct grammar.
  4. The child is making generalizations regarding verb tense and doesn’t know all of the variations. The child doesn’t honestly know to make something “sound right.”
    • For example: Most often the child knows to add -ed when speaking about a past time event (jump / jumped). But what about run or write?  It’s not runned or writed.
    • Or while they might see the -ed ending, they don’t always know which is the correct pronunciation (is it /ed/, /t/, or /d/??).
    • The child does not yet know all of the grammar rules regarding participles and irregular verbs – perhaps due to developmental level or hearing incorrect language use among peers or family.

No matter the cause, it is our job as the teacher to try to help a child self-monitor and fix these types of errors. So there are prompts that are often effective to help a child recognize and correct their reading when it doesn’t sound right. Continue reading

Reading Fix-it Strategies: Part 1 “Does it make sense?”

by C. Elkins, OK Math and Reading Lady

What strategies do your students use to fix their reading? As teachers, we want our students to recognize when something doesn’t look right, sound right, or make sense — and FIX IT! But, do they use the same strategy over and over again — or worse — not even try to fix a mistake? This post will begin a series about good fix-it strategies (for any age reader) and prompts teachers can use to encourage students to use them. Keep reading for a FREE prompting guide, poster, and bookmark to use in your classroom.

The fix-it strategies I will share are based on the three cueing systems in reading: Meaning, Structure, and Visual. When students make errors in their reading, the errors fall into one of these 3 categories. 

In this post, I will focus on the MEANING system, which in my opinion is the most important one. After all, the ultimate goal in reading is to comprehend or make meaning. When a reader comes to a hard word, is he/she only trying to sound it out? Or are they thinking about what makes sense and sounds right? Hopefully, a little of each. A good reader looks at the letters, combined with the structure and meaning of the story to decide what that tricky word could be.

I’m sure you are familiar with this scenario.  A child sees this text:  She went to the store to get some milk. But, the child reads it as:  She went to the story to get some milk. And the child keeps on reading, oblivious to their mistake. After all, the word does look like story.

Which one of these prompts do you think will help the child fix their reading most efficiently? Continue reading

Back to school books and activities

by C. Elkins, OK Math and Reading Lady

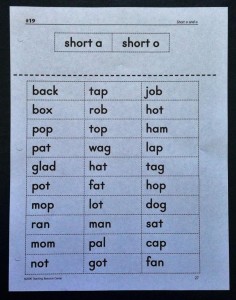
As part of building a classroom community, you likely will have many discussions about diversity, friendship, and showing respect in various ways.  Here are some great resources for literature that might emphasize the point you are trying to make.

Weareteachers.com 14 books with great follow-up ideas.

  • This site is one of the best because it doesn’t just give a summary of the story, but it provides very practical follow up ideas include a get-to-know-you bingo, anchor charts, self-portrait, writing, posters, brainstorming, drawing, etc.
  • For the above book, “Dear Teacher,” she suggests writing a postcard to a friend or family member telling them about the first week of school.
  • For the book, “Name Jar,” the article suggests brainstorming and creating a poster showing different ways to greet a new student.  

5 Back to School Books for 3rd Grade (Pinterest from notsowimpyteacher.com):

  • There might be some new titles here that kids haven’t heard in previous years.

Back to school books for upper elementary (teachingtoinspire.com).

  • This teacher provides some printables to accompany the books she recommends. These deal with more advanced issues such as kindness, diversity, perseverance, homework and writing.
  • One of the books she features is “The Important Book” by Margaret Wise Brown. It’s been around for awhile (for a good reason). A perfect book for getting kids to write details around one topic. This can actually be used any time of year – not just the beginning. For the schools I visit, I have a set of these books you may borrow. Or send me a message and I will send you more information about this book and its link to writing possibilities! Or, of course, I can help you do a lesson using these any time of the year.

Don’t have the books mentioned? Your school library might be able to get it from another library. Or – check youtube.com.  Many books are shared this way!

Enjoy!  And please share some other titles and/or beginning of school activities you love.

Writing Part 8: Six Traits of Writing and Descriptive Model

by C. Elkins, OK Math and Reading Lady

This will be the final part of my writing series. The focus today is on the Six Traits of Writing. 
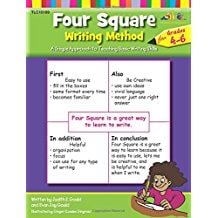
The six traits are a tool for teaching writing, leading to a quality product.  They are not an organizational model (such as Four Square).  This model was originally developed by the Northwest Regional Educational Laboratory in Oregon. Here is a link to their website which includes more resources, definitions, and research:  http://educationnorthwest.org/traits/

I will refer to the six traits, although Education Northwest added a seventh trait (presentation) and titles it “Six + 1 Trait Writing.” Keep reading to find some FREE RESOURCES.

So what are the Six Traits that define quality writing?  See full definitions by clicking HERE:

  • Ideas:  This is the main message or topic.
    • The message is written clearly.
    • It is interesting and shows understanding of the topic.
  • Organization:  This is the structure of the piece. Connections are strong.
    • Everything written links to the message.
    • A good beginning and ending grab the reader.
    • Organization is evident. (Link to text structures of sequence, compare-contrast, description, problem-solution, and cause-effect.)
  • Sentence Fluency:  This is the flow and rhythm of the writing.
    • Varied sentence beginnings and lengths.
    • Does it sound smooth and interesting, showing good use of transitions?
    • Are some words emphasized for effect?
  • Voice:  This is the writer’s personal tone coming through.
    • The writing sounds like the author.
    • The author’s feelings and style come through the writing.
    • It shows sincerity, honesty, and conviction.
  • Word Choice:  This is the vocabulary the author chooses. 
    • Selects the best words to fit the author and the message.
    • Does not repeat words too many times.
    • Replaces overused words.  (Search for “Said is Dead” on Pinterest.)
    • Natural, but precise and vivid.
    • Might include well-placed figurative language.
  • Conventions:  This is the mechanical correctness – the rules of language. Expectations should be based on grade level lessons and standards.
    • Spelling
    • Grammar
    • Punctuation
    • Capitalization
  • Presentation (the +1 trait):  This is how the writing looks on the page – the overall appearance.
    • text or font
    • neatness / handwriting
    • graphics
    • spacing and borders

Continue reading

Writing Part 7: Four Square Writing Model

by C. Elkins, OK Math and Reading Lady

One of my favorite models for organizing writing is the Four Square Model.  I got the chance to attend a workshop conducted by the author of these books and I have been a fan ever since. This organizational model can be applied from KG to 5th grade (and beyond).

Four Square Writing:

Order HERE.  It is developmentally appropriate to start with pictures for the youngest and gradually add sentences to explain the topic. For those who can write sentences, this model can help students build from a single five sentence paragraph (first and second grades) to the 5 paragraph essay (3rd and up). This model is great for expository, persuasive, and descriptive types of writing. For intermediate students, this format helps them organize the main idea, subtopics, details, and transition words.

  1. Students become better at seeing the relationship between the main topic and sub-topics such as: Fruit — apple, grape, cherry. I believe if students can write about a topic and the supporting details, then they can more easily recognize these in text. Description is one of the five main text structures.
  2. KG students start with pictures. Then young students (first or second) create a topic, 3 supporting details, and a beginning or concluding sentence to create a single paragraph.
  3. See this precious video from a first grade class showing how to use the four square method First Grade 4-Square Writing (Mr. Alba’s Class)

Thank you to teachers in Lawton for sharing some of the the work students did when I worked with them on use of this model. Here are a few samples (first and fifth grades): Continue reading

Writing Part 6: Mini Lessons

by C. Elkins, OK Math and Reading Lady

Thanks for hanging in there regarding my Writing series.  Today I will focus on using writing mini-lessons. The mini-lesson is the teacher’s chance to show children how to do all of the different things writers do — a little bit at a time.

Writing Mini-Lessons:

  • Mini-Lessons are meant to be short  – maybe 10-15 minutes.
  • They are meant to address student needs – so your decisions shouldn’t necessarily come from a sequenced list, but based on what you see the students doing (or not doing).
  • Focus on one topic per mini-lesson. Then practice that one aspect of writing.
  • Decisions on mini-lessons can be based on any writing students are doing (journal, prompts, reading responses, and other curriculum writing assignments).
  • How often? I would try 1-2 mini-lessons per week. Alternate days with handwriting instruction and journal writing if you only have one block of time for writing.
  • Writing mini-lessons can also be done as a part of your guided reading weekly routine. This means you can differentiate your instruction based on the group of students with whom you are working.
  • Always model and use think alouds. Your writing mini-lessons will be more effective if you have already been utilizing shared writing methods. Use some of your own writing to introduce a mini-lesson.
  • Don’t forget to praise when you notice a student who has implemented some of your mini-lesson strategies.  Give specific info to a student directly. Specific praise (not just “Good job”) will result in more consistent use of what you praised them for. Example:  “I noticed you have ending punctuation on all of your sentences. Keep it up!” 

Mini-Lesson Ideas: These are not listed in any particular order because you should select ones based on what students need. However, I did put them in a somewhat developmentally appropriate order from younger to older students.

Get your free printed PDF copy of these ideas (enough for a whole year) by clicking HERE. Continue reading

Writing Part 5: Temporary Spelling and Word Wall

by C. Elkins, OK Math and Reading Lady

Can u reed wut i am riting? Can u tel frum my riting that i no most uv the mane sonds in werds? I no sum site werds, i no the sonds in order frum left to rite as i strech them out. I no sum vowl paterns. I can evn spel sum 2 silubul werds by trying 1 silubul at a time. After i am dun riting, the teecher helps me pik out 2 werds to lern. Then i practis them a fu timez and add them to my speshul werd book so i can find and uz them agen.

This is an example of temporary spelling appropriate for a late KG-2nd grade student. The “student” was able to focus on the content of their writing using spelling strategies mentioned in my previous posts:

  • Stretch out sounds or use sound boxes.
  • Clap to hear the distinct syllables and spell each syllable separately.
  • Think about spelling patterns from known or rhyming words.
  • Use words posted on the word wall and/or in the individual word book.
  • Try words different ways to see which one looks right.

For this student, I would have selected these 2 words (werd/word and frum/from) for further practice because they were used often, close to the correct spelling, and only need minor adjustments. I usually have them circle the words we chose. These words only need minor tweaking and they are likely to be words needed often for future writing. When the words are added to his/her word book, they are there for reference and are more likely to be used correctly in the future. Continue reading

Writing Part 4: How to get kids to stay on topic

by C. Elkins, OK Math and Reading Lady

I support you, OK teachers!!! 
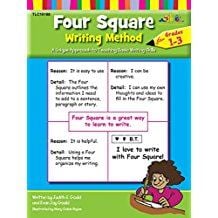
I walked with you in 1990 and in 2007-2008. I feel your frustrations and have been contacting OK representatives and senators this past year on your behalf. Last in pay, overcrowded classes, lack of supplies, on and on – I experienced it myself and see it everyday when I visit classes. I am proud of you, your goals, and your actions to affect change.  I am with you all the way!!!

Today’s post will focus on moving children toward more independent writing. A strategy I love to use addresses the following writing points:

  1. Composing sentences
  2. Staying on the chosen topic
  3. Practicing temporary spelling strategies (sounding out, stretching sounds, clapping syllables, thinking of words that rhyme, using related known words)
  4. Applying conventions of print (spacing within and between words, left to right, return sweep, etc.)
  5. Using class word wall (or individual word book)
  6. Proofreading and fluency

I have used this strategy and have felt successful with it. After students have seen me model writing in various forms (example: class news or other shared writing experiences), I usually follow these steps: Continue reading

Writing Part 3: Modeling and Shared Writing

by C. Elkins, OK Math and Reading Lady

I will share several writing strategies via this series of posts on Writing. Part 1 was a focus on the continuum and word-writing strategies. Part 2 focused on the importance of letter formation and handwriting (printing) with a way to incorporate it with concepts of print, phonics, and composing sentences. In this part, I would like to focus on a modeling / shared writing strategy I call “Class News.” I utilized this strategy with KG-3rd grade classes and will share some pictures and ideas with you. I also wrote an article about this that appeared many years ago in the Oklahoma Reader, a publication by the OK Reading Association.

What is it?  I called students together each day for math talk time. After this, we held a class news session. Writing the date was part of the routine (but it doesn’t have to be). Students took turns sharing news of importance to them – and sometimes some other news about the day was added. For younger students it was a definite time to emphasize a variety of concepts of print:

  1. Directionality and return sweep (going to the next line from left to right)
  2. Spacing within and between words (see part 2 reference to “spaghetti and meatballs”)
  3. Letter formation – tall letters vs. short letters vs. below the line letters
  4. Use of capitals and punctuation
  5. Noticing the difference between letters, words, and sentences
  6. The opportunity to think aloud about letter sounds and sight words

After a sentence was orally agreed on, I wrote parts of it and solicited help from students for parts I felt they could be successful with. This often varied depending on what I wanted to emphasize. At first it was beginning letters or ending letters. Then I would try leaving out the vowels for students to work on. Gradually, different word parts or whole words were left for students to complete (usually with a different colored marker). All the while I was right next to them guiding them.

I also kept a few learning aids handy (alphabet chart with pictures, letter formation chart, vowel pairs chart, etc.) so we could reference them when needed. I have linked some FREE mini charts at the end of this post. Example:  A student is finishing the word “toad” and is thinking of the correct vowel pair, so I show my vowel pairs chart and point to the word “boat” and say, “Do you see a word / picture that has the same middle sound as the word toad?” . . . child finds boat to see the letters oa.  I also kept a small white board (or clip board) handy. For example, if the child came to write the sight word “have” on the chart, I might ask them to write it on the white board or clipboard first to check their thinking – that way all the kinks were worked out and the news chart stayed in a non-smudged condition. I also used the whiteboard to make sound boxes for a student to work out the sounds (like for a cvc word). Continue reading

Writing Part 2: Concepts of Print and Handwriting

by C. Elkins, OK Math and Reading Lady

I read an interesting blog post about checking children’s ability to distinguish between letters, words, and sentences. While I always considered that a reading skill related to “concepts of print,” it dawned on me that this relates strongly to a child’s successful writing experience too. This whole concept is what I will explore in today’s post – along with my opinions and ideas about teaching handwriting / penmanship.

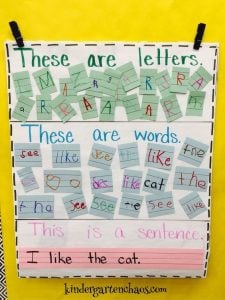
Do you want to see if your students can distinguish between letter, word, and sentence? Try something like this from www.kindergartenchaos.com.

Here are some other links to help your children practice this.

  1.  Letter, Word and Sentence Sort (Free @ TPT)
  2. Kinderblossoms.blogspot lesson using poem to teach letter vs. word vs. sentence concepts
  3. Word, letter, or sentence cut-n-paste (free @ TPT)
  4. Pocket chart concepts of print (free @ TPT)

Using poems on a weekly basis (as with the spider poem in video from #2 above), make it easy to highlight these features (letter, word, sentence) as you continue to practice emphasizing the difference.

So when I want KG or 1st graders to write and I model how to write letters, and put space between these letters and words to write a sentence, they will hopefully have this concept under control. It seems to be pretty common that students aren’t always “seeing” this because they string everything together in one line with no differentiation in spacing between letters and words. Or they confuse letters with numbers.

Another blog I was reading had a great visual that I started trying regarding ways to teach spacing within words and between words when writing. Call it “spaghetti and meatballs.” 
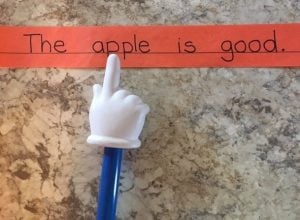
When writing words, the space between the letters (within the word) should be really close (so that a skinny piece of spaghetti will fit in between). When writing a sentence, the space between the words should be the size of a meatball. Placing an uncooked spaghetti strand is a great visual aid! Regarding the meatball, however — I would tell students, “We can’t lay a meatball on our paper, but one or two fingers might work because they are about the same size.” Or if possible, provide a popsicle stick to each student to use as their spacer. Continue reading